Creating GraphQL Batch Operations for AWS Amplify
In this article, you are going to learn how to create bulk queries and mutations that require authentication in Cognito for an AWS Amplify project using the AppSync API.
Note: This post is an advanced tutorial. Do you want to learn how to accelerate the creation of your projects using Amplify 🚀? I recommend checking out Nader Dabit's free course on egghead to learn the basics. Amplify's 'Getting Started' is also pretty good.
Another Note: Huge thank you to Mike for helping me debugging when I first set this up 🙏🏻.
While building my projects using AWS Amplify, I quickly found myself having to batch create objects. My first instinct was to use Promise.all.
import API, { graphqlOperation } from '@aws-amplify/api';
import * as R from 'ramda';

import * as queries from './graphql/queries';

// For the tutorial's sake we are creating the data here by using fixtures.
const todos = [
  { id: 1, title: 'Get groceries', description: '', completed: false },
  // Never skip leg day 🦵🏻
  {
    id: 2,
    title: 'Go to the gym',
    description: 'Leg Day',
    completed: true,
  },
];

const createTodo = input =>
  API.graphql(graphqlOperation(queries.createTodo, { input }));
// Careful, R.isEmpty is also true for [], {}, etc.
// You could also write x => x === '' to only catch empty strings.
const replaceEmptyStringWithNull = R.map(
  R.ifElse(R.isEmpty, R.always(null), R.identity)
);

// Map over the todos, to remove the id, replace the empty strings with
// null - so that DynamoDB doesn't yell at us - and execute the mutation.
await Promise.all(
  R.map(
    R.pipe(
      R.dissoc('id'),
      replaceEmptyStringWithNull,
      createTodo
    )
  )(todos)
);
As you can probably tell, Promise.all can lead to race conditions and other problems. What happens if one of the requests throws, but the others come through? 🤔
It turns out since February you can write custom resolvers in AWS Amplify, which enables you to write your own batch actions for the AppSync API. If you aren't familiar with writing resolvers: I'm neither. You will get a sufficient basic feeling for them once you read their code further below. In Germany, there is a saying "A good horse only jumps as high as it has to."
We are going to write a custom resolver for batch creations with authentication. Having learned that, you should be able to do batch queries and updates on your own (e.g. leaving out authentication is strictly less code). If you have any questions, you can always hit me up on Twitter via @janhesters. (You might want to say "Hi" regardless.)
Let's code up an example using React 👏🏻!
Set Up the Example Project
Create a new React app.
npx create-react-app amplify-batch-example && cd amplify-batch-exampleAdd Amplify:
yarn add aws-amplify aws-amplify-reactNext, initialize Amplify. Add auth and api (amplify add <category>). While going through the prompts for api, choose Amazon Cognito User Pool authentication, choose Single object with fields and edit the schema like this:
type Todo @model @auth(rules: [{ allow: owner }]) {
  id: ID!
  title: String!
  description: String
  completed: Boolean
}
Otherwise, go with the defaults for both services. (Remember to run amplify push.)
Lastly, configure Amplify, so that you can wrap the default export in App.js with the withAuthenticator HOC. (Again, if you are still reading and don't understand what you are being asked to do here, check out the materials I linked at the beginning. Remember to come back later to read this article. It's not going away.)
Creating the Batch Mutation
The project is set up, and we are ready to create the batch mutation. First, we need to write a simple mutation in schema.graphql.
// ... Todo above

input CreateTodoInput {
  id: ID
  title: String!
  description: String
  completed: Boolean
}

type Mutation {
  batchAddTodos(todos: [CreateTodoInput]): [Todo]
}
Note: You need to run amplify add api without the batchAddTodos mutation first and then add it via amplify add update.
Tip: You can copy CreateTodoInput straight from the builds/schema.graphql folder 😉.¹
Before we create the custom resolver templates, we need to tell CloudFormation where it can find these custom resources. We can do this by adding a value for the "Resources" in amplify/api/<your-api-name>/stacks/CustomResources.json.
// Leave the rest as it is.
 "Resources": {
    "EmptyResource": {
      "Type": "Custom::EmptyResource",
      "Condition": "AlwaysFalse"
    },
    "BatchAddTodosResolver": {
      "Type": "AWS::AppSync::Resolver",
      "Properties": {
        "ApiId": {
          "Ref": "AppSyncApiId"
        },
        "DataSourceName": "TodoTable",
        "TypeName": "Mutation",
        "FieldName": "batchAddTodos",
        "RequestMappingTemplateS3Location": {
          "Fn::Sub": [
            "s3://${S3DeploymentBucket}/${S3DeploymentRootKey}/resolvers/Mutation.batchAddTodos.req.vtl",
            {
              "S3DeploymentBucket": {
                "Ref": "S3DeploymentBucket"
              },
              "S3DeploymentRootKey": {
                "Ref": "S3DeploymentRootKey"
              }
            }
          ]
        },
        "ResponseMappingTemplateS3Location": {
          "Fn::Sub": [
            "s3://${S3DeploymentBucket}/${S3DeploymentRootKey}/resolvers/Mutation.batchAddTodos.res.vtl",
            {
              "S3DeploymentBucket": {
                "Ref": "S3DeploymentBucket"
              },
              "S3DeploymentRootKey": {
                "Ref": "S3DeploymentRootKey"
              }
            }
          ]
        }
      }
    }
  },
// ... more code
We provided CloudFormation with the file paths and the name & type of the mutation for the resolvers. Let's write them now. We will start with the resolver for requests. Create a file amplify/api/<your-api-name>/resolvers/Mutation.batchAddTodos.req.vtl.²
#foreach($item in ${ctx.args.todos})
    ### [Start] Owner Authorization Checks **
    #set( $isOwnerAuthorized = false )
    ### Authorization rule: { allow: "owner", ownerField: "owner", identityField: "cognito:username" } **
    #set( $allowedOwners0 = $util.defaultIfNull($item.owner, null) )
    #set( $identityValue = $util.defaultIfNull($ctx.identity.claims.get("username"),
    $util.defaultIfNull($ctx.identity.claims.get("cognito:username"), "___xamznone____")) )
    #if( $util.isList($allowedOwners0) )
        #foreach( $allowedOwner in $allowedOwners0 )
            #if( $allowedOwner == $identityValue )
                #set( $isOwnerAuthorized = true )
            #end
        #end
    #end
    #if( $util.isString($allowedOwners0) )
        #if( $allowedOwners0 == $identityValue )
            #set( $isOwnerAuthorized = true )
        #end
    #end
    #if( $util.isNull($allowedOwners0) && (! $item.containsKey("owner")) )
        $util.qr($item.put("owner", $identityValue))
        #set( $isOwnerAuthorized = true )
    #end
    ### [End] Owner Authorization Checks **

    ### [Start] Throw if unauthorized **
    #if( !($isStaticGroupAuthorized == true || $isDynamicGroupAuthorized == true || $isOwnerAuthorized
        == true) )
        $util.unauthorized()
    #end
    ### [End] Throw if unauthorized **
#end

#set($todosdata = [])
#foreach($item in ${ctx.args.todos})
    $util.qr($item.put("createdAt", $util.time.nowISO8601()))
    $util.qr($item.put("updatedAt", $util.time.nowISO8601()))
    $util.qr($item.put("__typename", "Todo"))
    $util.qr($item.put("id", $util.defaultIfNullOrBlank($item.id, $util.autoId())))
    $util.qr($todosdata.add($util.dynamodb.toMapValues($item)))
#end
{
  "version": "2018-05-29",
  "operation": "BatchPutItem",
  "tables": {
      "Todo-dqxfzxnspvd3pf5facjmlgtsui-batch": $utils.toJson($todosdata)
  }
}
And create a file for the response in amplify/api/<your-api-name>/resolvers/Mutation.batchAddTodos.res.vtl.
#if ($ctx.error)
$util.appendError($ctx.error.message, $ctx.error.type, null, $ctx.result.data.unprocessedKeys)
#end
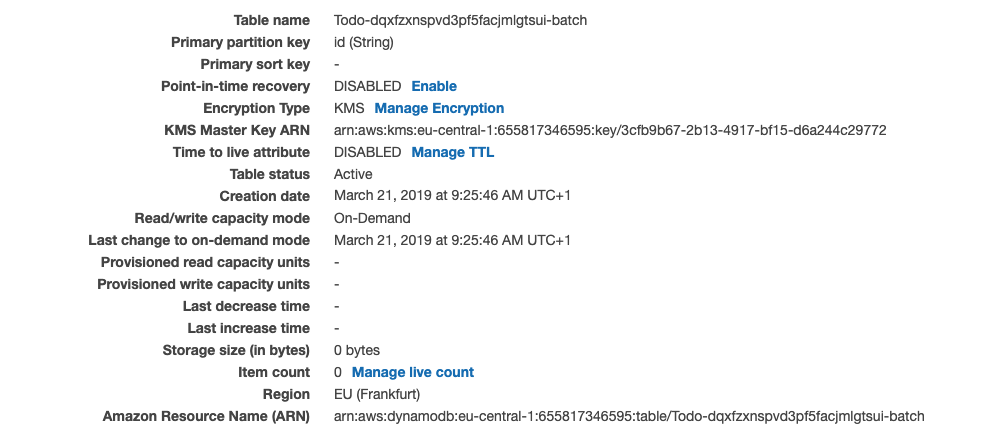
$util.toJson($ctx.result.data.Todo-dqxfzxnspvd3pf5facjmlgtsui-batch)Okay, hold on, what's going on here?³ 🤔
We start by looping through all items in the request, checking them for permission and throw if a permission is denied. You can compare this file to amplify/api/<your-api-name>/build/resolvers/Mutation.createTodo.res.vtl and see that the code generated by the API does this too, but just for a single todo. Subsequently, we loop through all items again. In this loop, we add fields for createdAt, updatedAt and __typename. We also add an auto-generated id. These additions are there to keep the data consistent with the data that gets created by the resolvers that result from the Amplify API. We then push the processed items into a todosdata array. Finally, we make a BatchPutItem operation, adding the data to the correct table. Note that to support BatchPutItem the "version" number is higher than the one in the createTodo resolver. Additionally, make sure you use the correct name of your table. You can find it in you AWS console when you search for DynamoDB.
In the response, we have to handle errors for the items whose operations failed. We pass the unprocessed keys back to the caller via the errorInfo field. Afterwards, we return the response as JSON. The response will look like this:
{
  "data": {
    "batchAddTodos": {
      // ... processed todos data
    }
  },
  "errors": [
    {
      "path": ["batchAddTodos"],
      "data": null,
      "errorType": "DynamoDB:ProvisionedThroughputExceededException",
      "errorInfo": {
        "todos": [
          {
            "sensorId": "1",
            "timestamp": "2019-03-20T17:21:05.000+02:00"
          }
        ]
      },
      "locations": [
        {
          "line": 61,
          "column": 2
        }
      ],
      "message": "You exceeded your maximum allowed provisioned throughput for a table or for one or more global secondary indexes. (...)"
    }
    // more unprocessed todos with their respective error message
  ]
}
As you can see we neatly separated the processed from the unprocessed todos in our response. This request is atomic, so there are no race conditions ⛔️🏎.
Using the Batch Mutation
After running amplify push again, let's use the new mutation in our app.
import './App.css';

import API, { graphqlOperation } from '@aws-amplify/api';
import { withAuthenticator } from 'aws-amplify-react';
import React, { useEffect, useState } from 'react';

import { listTodos } from './graphql/queries';
import { batchAddTodos } from './graphql/mutations';

// If you don't like Ramda 🐏
const map = f => arr => arr.map(f);
const pipe = (...fns) => x => fns.reduce((y, f) => f(y), x);
const dissoc = prop => ({ [prop]: _, ...obj }) => obj;
const mapObj = f => obj =>
  Object.keys(obj).reduce(
    (acc, key) => ({ ...acc, [key]: f(obj[key]) }),
    {}
  );
const replaceEmptyStringWithNull = x => (x === '' ? null : x);
const prepareTodos = map(
  pipe(
    dissoc('id'),
    mapObj(replaceEmptyStringWithNull)
  )
);

const todoFixtures = [
  { id: 1, title: 'Get groceries', description: '', completed: false },
  {
    id: 2,
    title: 'Go to the gym',
    description: 'Leg Day',
    completed: true,
  },
];

function App() {
  const [todos, setTodos] = useState([]);

  useEffect(() => {
    async function fetchTodos() {
      try {
        const todoData = await API.graphql(graphqlOperation(listTodos));
        setTodos(todoData.data.listTodos.items);
      } catch (err) {
        console.log('error: ', err);
      }
    }

    fetchTodos();
  }, []);

  async function handleClick() {
    try {
      const input = { todos: prepareTodos(todoFixtures) };
      const res = await API.graphql(
        graphqlOperation(batchAddTodos, input)
      );
      setTodos([...todos, ...res.data.batchAddTodos]);
    } catch (err) {
      console.log('error ', err);
    }
  }

  const renderTodo = ({ id, title, description, completed }) => (
    <div key={id}>
      <h3>{`${title} ${completed ? '✅' : ''}`}</h3>
      <p>{description}</p>
    </div>
  );

  const renderTodos = map(renderTodo)(todos);

  return (
    <div className="App">
      <div>{renderTodos}</div>
      <div>
        <button onClick={handleClick}>Batch Add</button>
      </div>
    </div>
  );
}

export default withAuthenticator(App, { includeGreetings: true });
It works 👌🏻. Remember: You can clean up the resources and delete everything by running amplify delete.
Summary and Closing Comments
We wrote custom resolvers to add batch create items. We eliminated race conditions and instead get back both, the processed items and the unprocessed items along with their respective error message. Keep in mind that BatchPutItem is limited to 25 items.
I think Amplify is an excellent tool that lets you realize your ideas quickly. It's unfortunate that the CLI can't generate the code for some everyday tasks like these batch requests, yet. I can't wait until it can! Until then we have to take care of these things manually 🎓.
Helpful Resources
If you want to dig deeper, I can recommend the following resources:
- The AWS Amplify docs for custom resolvers. These will teach you how to write resolvers in general.
- The 'AWS AppSync Tutorial: DynamoDB Batch Resolvers'. It shows how to make batch creations using AWS AppSync.
- The AWS AppSync docs for the resolver mapping template which explains what the keys in the
.vtlfiles like"operation"and"key"do. - The AWS AppSync Docs for the $util reference which explains the methods used by
$util.
You can spend hours reading and studying these links, but they will equip you with the knowledge to tackle a variety of problems.
Footnotes
- You soon might have these inputs in your schema, too! 🎉
.vtlstands for "Velocity Template Language". There is a neat VSCode extension for Velocity you want code highlighting for this language. Here is how it relates to the data sources for AWS AppSync.- Pro tip: You can "
console.log" by using$util.appendError($util.toJson($ctx.result.data))in the resolvers.
Bonus
Here is a little code snippet showing asyncForEach. This function in conjunction with splitEvery(25) from Ramda can help you chunking your requests if you want to add more than 25 items. You can split the items in chunks of 25 and then call the mutation for each chunk using asyncForEach.
const waitFor = ms => new Promise(r => setTimeout(r, ms));
const asyncForEach = async (array, callback) => {
  for (let index = 0; index < array.length; index++) {
    await callback(array[index], index, array);
  }
};

const start = async () => {
  await asyncForEach([1, 2, 3], async num => {
    await waitFor(3000);
    console.log(num);
  });
  console.log('Done');
};

start();